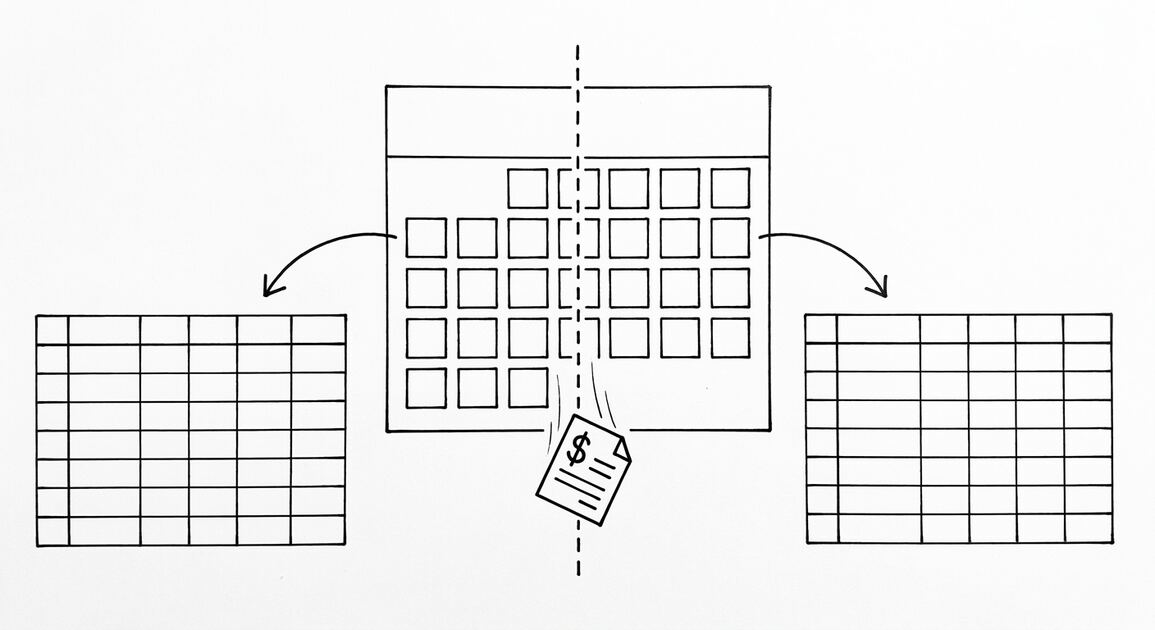

A PDF bank statement is a text-positioned document, and Google Sheets is a grid, so converting between them means rebuilding the transaction table as rows and columns before import. Google Sheets imports CSV, so the statement must be shaped as a clean CSV first, then brought into a sheet with the right column design.
For a small business owner, the payoff is real: once the data lives in Sheets, you can share it with a bookkeeper, filter by category, and run formulas for totals and reconciliation. The running balance printed after each transaction acts as a built-in checksum, so you can verify the result yourself before anyone else sees it.
The running balance printed after each transaction acts as a built-in checksum: if an imported row does not change the balance by the amount shown, the row is wrong or out of order.
Key facts. Google Sheets imports CSV, so the converted statement must be shaped as a clean CSV first. Column design should include Date, Description, Amount, and Balance for reconciliation. The running balance acts as a checksum after import. Native text PDFs parse directly; scanned PDFs need OCR first. Google Sheets enables sharing, filtering, and formulas for categorization.
Column design puts Date, Description, Amount, and Balance in separate columns so reconciliation, filtering, and formulas all work after import.
Why a PDF bank statement needs rebuilding before it reaches Sheets
A PDF is a page description format. It records where each piece of text appears, not what table it belongs to. Your bank designs the statement for human reading, with headers, footers, and summary boxes mixed among the transactions.
That layout is the problem. A transaction description can wrap across two lines. A page break can land in the middle of a row. Column headers can repeat on every page. None of these structures survive a simple copy and paste into a spreadsheet.
Extraction therefore means reading the positioned text and deciding which pieces form one transaction. The tool must detect row boundaries, assign each value to a column, and keep the order intact. Done well, you get one row per transaction with Date, Description, Amount, and Balance in separate columns.
If you have ever pasted statement text into Sheets and watched dates land in the amount column, you have seen this firsthand. The fix is not better pasting. It is parsing the document structure instead of the visible text.
Native text PDFs vs scanned statements
A native text PDF carries an embedded text layer. You can select words with your cursor, search the document, and copy text cleanly. These files can be parsed directly, because the characters and their positions are already stored inside the file.
A scanned statement is an image. It has no text layer at all. The pages are photographs of paper. Before any extraction can happen, the image must pass through OCR to recover the characters. OCR adds a step, and it introduces its own errors, especially with small fonts, faint printing, or skewed pages.
If your download is image only, request a digital statement from your bank portal instead. Most banks offer a PDF download that preserves the text layer. That single change removes the OCR step and usually improves accuracy.
When OCR is unavoidable, treat the result as a draft. Verify every row against the printed running balance, because OCR errors in amounts are common and easy to miss by eye.
From Bank Statement to QuickBooks-Ready File
That manual cleanup you just read about? This tool skips it. Turn your PDF into QBO for QuickBooks without storing your data anywhere.
Start ConvertingColumn design for a Google Sheets bank statement
The minimum useful design has four columns: Date, Description, Amount, and Balance. Date drives sorting and filtering. Description carries the merchant or memo. Amount holds the transaction value. Balance is the running total and serves as the checksum.
Keep amounts in one column with a sign rather than splitting debits and credits. A single Amount column sorts cleanly and feeds simple SUM formulas. Use a separate signed value for withdrawals so the running balance stays one formula.
Use a consistent date format such as YYYY-MM-DD. Mixed formats break sort order and confuse formulas. If your bank prints dates as MM/DD/YYYY, convert them during extraction so the sheet stays uniform.
Add a Category column only after the core four are verified. Categorization is a downstream step, not part of extraction. Mixing it in too early makes errors harder to spot.
| Column | Purpose | Notes |
|---|---|---|
| Date | Sorting and filtering | Use YYYY-MM-DD |
| Description | Merchant or memo | Keep full text |
| Amount | Transaction value | Signed number |
| Balance | Running checksum | Must match PDF |
| Category | Downstream tagging | Add after verification |
For the broader conversion picture, see how to convert a bank statement to Excel. The same column logic applies across output formats.

Step-by-step: convert a PDF bank statement to Google Sheets
Step one is to upload the PDF to your converter and let it detect the transaction table. A good tool reads the positioned text, identifies the column structure, and proposes rows. Review that proposal before exporting.
Step two is to check the row count. Count the transactions on the PDF and compare it to the extracted rows. A mismatch almost always means a wrapped description was split into two rows or a page break ate a transaction.
Step three is to verify the running balance column. Each row should change the balance by its amount. If a row shows a deposit of five hundred dollars but the balance does not move by five hundred, the row is wrong or out of order. Fix it before exporting.
Step four is to export to CSV. Google Sheets imports CSV directly, so the file must be clean: one header row, consistent delimiters, and no stray blank rows. If you are unsure about format choice, read how to choose a bank statement output format.
Step five is to import the CSV into Google Sheets. Use File, then Import, and choose to replace or append. Check that dates stay dates and amounts stay numbers. Formatting drift at import is a common source of later errors.
Step six is to reconcile. Compare the extracted opening balance and closing balance to the PDF. They must match exactly. If they do not, find the row where the running balance breaks and correct it.
After import, set the number format on the Amount and Balance columns. Currency format with two decimals keeps values readable and prevents rounding surprises in formulas. Set the Date column to your chosen date format.
Use filters on the header row to sort and review. Filtering by description groups similar merchants, which helps spot duplicates or missing rows. Sorting by date confirms chronological order.
| Step | Action | What to check |
|---|---|---|
| 1 | Upload and detect table | Column structure looks correct |
| 2 | Count rows | Matches PDF transaction count |
| 3 | Verify running balance | Each row moves balance by its amount |
| 4 | Export to CSV | Clean single header row |
| 5 | Import into Sheets | Dates and amounts keep types |
| 6 | Reconcile | Opening and closing balances match |
Verifying the numbers and common extraction failures
The running balance is the single best validation tool you have. It is printed by the bank after every transaction, so it is independent of your extraction. Use it as a checksum rather than trusting the extracted amounts alone.
Walk the rows in order. For each transaction, add deposits and subtract withdrawals from the previous balance. The result should equal the printed balance on that row. If it does not, one of three things is wrong: the amount, the sign, or the row order.
Pay attention to signs. Banks print withdrawals as negative or in parentheses, and deposits as positive. A parser that flips a sign will still produce a plausible looking row, but the running balance will expose it immediately.
Also watch for out of order rows. Some statements list pending transactions or group them by type. If the running balance jumps backward, the rows are not in chronological order. Sort by date only after you confirm the balance chain.
After every row checks out, confirm the final balance equals the closing balance on the PDF. That single match is your proof that the file is complete and accurate.
Wrapped description lines are the most common failure. A long merchant name or memo continues on the next visual line, and a naive parser treats it as a new transaction. The result is an extra row with a blank date and amount.
Page breaks that split a transaction are next. If a row starts at the bottom of one page and finishes at the top of the next, the parser may drop half of it or create a partial row. Always check the first and last rows of each page.
Merged columns collapse two fields into one. This happens when a description contains a number that looks like an amount, or when the parser misreads column boundaries. You will see a date where an amount should be, or a description that includes a dollar figure.
Duplicate headers repeated on every page can also be imported as data rows. Filter them out by checking for rows where the description equals a column header like Date or Balance.
| Failure mode | Symptom | Fix |
|---|---|---|
| Wrapped description | Extra row with blank date and amount | Merge lines into one row |
| Page break split | Partial row at page edge | Rejoin the two halves |
| Merged columns | Number in wrong column | Reassign to correct field |
| Duplicate header | Header text in data rows | Delete those rows |
For the Excel-focused version of this check, see PDF bank statement to Excel. For the Google Sheets workflow overview, see convert bank statement to Google Sheets.
Choosing the output format and next steps
Excel is the right choice when a person will review or edit the data. CSV suits software pipelines and accounting imports. Google Sheets fits shared workflows and collaboration. QuickBooks format suits direct import into bookkeeping software.
Match the format to the next step, not to habit. If the file goes to a bookkeeper, ask which format they prefer. If it feeds an automated pipeline, CSV or QBO is usually better than a spreadsheet.
For help deciding, read how to choose a bank statement output format. For the broader conversion picture, return to the bank statement to Excel guide above.
Finally, keep your original PDF. The converted file is a working copy, but the statement remains the authoritative record. Store both, and reconvert if you ever need a fresh extraction.
For a CSV-focused walkthrough, see convert PDF bank statement to CSV.
From PDF to Excel in one click
Forget retyping line by line. Upload any bank statement, get a spreadsheet you can actually use. Your files are never stored, and you can test the converter with 3 free conversions.
Try it free